
How to save a print file to disk?
Question: I want RPM Remote Print Manager® ("RPM") to copy the data file to a directory I specify without printing it or running a program. How do I accomplish this?
Answer: you can accomplish this using the Archive to Folder action in RPM. Archive to Folder is exceptionally flexible and valuable in many situations. In this FAQ, we'll focus on simply writing to disk. In the end, we'll reference other articles which explain expanded features.
You have probably noticed that most print servers don't archive print jobs to disk. RPM may be unique in this respect.
How to save the file without the printer
Saving your print jobs without actually printing them is surprisingly common. There are many reasons for doing this, including migrating your library of company data to a new server or document storage system.
Another use is to save a copy of your source print job as you print. Along those lines, many people keep a copy of their print job, converted to PDF. The Archive to Folder action plays a role there, too.
Step 1: determine the name of your print queue
There are two ways you could do this. The first is to look at the setup on your sending system. The second might be easiest; start the RPM service and run the RPM user interface from the Windows programs menu. Then, send print jobs and see what queue RPM creates containing your print jobs.
Step 2: add an archive action to this queue
Double-click on the queue name in the RPM user interface.
You don't need to worry about adding a transform for this example.
Let's add an Archive to Folder action. Look for the button that says, "Add Action." To the left of that is a drop list of actions. Select "Archive to Folder," then click the "Add Action" button.
The Archive to Folder setup
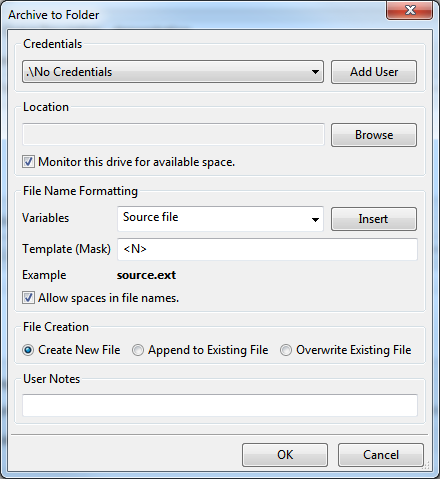
In this example, you won't be archiving to a shared folder, so that you won't need Credentials. However, if you need to use shared folders, please see this page.
Click the Browse button, use the Windows dialog to select the folder, then click OK.
The default file name is probably OK. You can certainly try it, then change the file name if you prefer.
You can experiment with the File Creation options, although "Create New File" is probably a sound first choice.