Introduction
We worked with a customer using RPM Remote Print Manager® ("RPM") recently, who told us that jobs were staying active until someone manually reprinted them. We were concerned about this, of course, but since they are in a different hemisphere, it was not convenient for the customer to have us log into their system.
They sent us their database, and from it, we learned that:
- Most of their queues were disabled but had jobs otherwise ready to print
- Many queues had no actions enabled yet had jobs available to print
- Only four queues were enabled, processing and not holding; there was one job available to print, except that the job itself was on hold
Therefore the purpose of this article is to explore:
- what queues are
- what the various queue states mean
- how to manage your queues
- what the essential queue setup operations are
Queue definition
In general, a queue has some order, and like "things" which are grouped because of a common goal. When you go through airport security, you are part of a considerable number of people with many distinct agendas and destinations, but what we all have in common is that we have to get checked first so we can fan out to our respective destinations.
In RPM, a queue has these properties:
- A unique name (unique to this installation)
- A set of processing instructions that will apply equally to every job sent to this queue
- A collection of states which govern job processing
Queue names
Regarding queue names: they have no meaning; they only have to be unique. There is no significance to RPM whether your queue is called "lp" or "hp410c" or anything. We don’t do special handling based on the name.
RPM queue names need to be plain ASCII text or UTF-8. We see plenty of examples of queue names in all the major scripts of the world.
Naturally, your print client needs to specify the queue name you intend to use. Fortunately, it’s easy to rename a queue if you’ve set up your print client already and didn’t manage to coordinate when you configured RPM. The only stipulation is that the new name must not exist in this installation.
The system uses queues to process jobs
RPM has a component called the scheduler, which decides the next job to handle. This decision is not left up to the queue. However, the scheduler does not determine *what* happens to the job. That information is contained entirely in the queue, using what we refer to as transforms and actions.
You might remember that the customer above had some queues with no actions. What happens in that case? If a queue has no actions, RPM will not run the job … because there is no configuration on what RPM is supposed to do.
Also, actions can be enabled or disabled. If the queue has no enabled actions, that is, all are disabled, then, similarly, it will not be able to run the job. That is what the customer experienced.
Actions are required; transforms are optional.
We already have a lot of content on our website illustrating how to use transforms and actions to accomplish various tasks. I think many people understand that already, and fewer people understand the queue states and why that matters. To move on, let me refer to some articles which illustrate setups utilizing transforms and actions:
- How to process text print with control over font and spacing
- How to send print-ready jobs directly to your printer
- How to work with print job settings to send your print job to 3 trays in the same printer
- How to convert a variety of print jobs to PDF/top-tasks-creating-pdfs
- How to attach watermarks to your print jobs or PDF creation
We have much more besides this.
Managing queue performance using states
When I introduced RPM back in 1995, I had a pretty fair idea of the types of user controls I wanted in the product. My experience with print servers up to that point was that they were non-interactive systems with a basic level of control. The system admin controlled this by editing a configuration file. I realize some Linux systems now have interactive menus, and that’s a positive step forward.
What I hoped to accomplish with RPM was for the user to have the final word over when jobs print, if they print, etc. I imagined the user having specific questions in mind that the behavior of the queue states would answer:
- Do I want this queue to accept print jobs at all right now? This is answered by enable & disable.
- Do I want the queue to accept print jobs but print later when I decide? This is answered by suspend & resume.
- Do I want fine-grained control over jobs, to have them print when I say, in the order I say? This is answered by hold & release.
Let’s illustrate how these work with some examples. I’ll use my own test setup.
Using queue enable and disable
Go to the user interface. At the top left, below the menu and tool buttons, is the list of queues and their states:
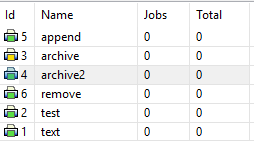
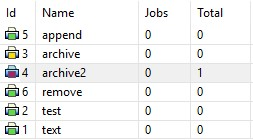
Here I have five queues with a green printer icon, and one with a yellow printer icon. We’ll cover all that below.
Note that the queue "archive2" is highlighted. If I go to the bottom left corner of the user interface I’ll see the Queue Status settings:
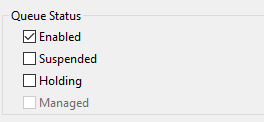
This says the queue "archive2" is enabled, not suspended, and not holding. If I send print jobs to this queue, I fully expect them to process according to the setup I’ve defined for that queue.
Here I am printing a file to that queue using the Microsoft "LPR" command:

No errors reported by Microsoft. And in fact, RPM reports one job:
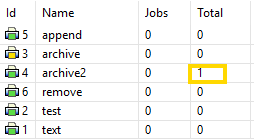
Now, let’s disable the queue. I’ll make sure "archive2" is selected in the queue list, and then I’ll turn OFF the "enabled" setting:
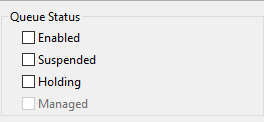
And in fact, in the queue list, archive2 now shows up with a red printer icon:
Now when I try to print to this queue I expect to get an error:

Remember, the queue is disabled. In the Queue Status, select "Enabled" to enable the queue. Then it will be ready to receive jobs again.
Using queue suspend and resume
The idea behind suspending a queue is this:
- You send print jobs TO your RPM queue all you want, without error
- RPM will not schedule the jobs so long as the queue is suspended
- You can manually control when your jobs process
The beautiful thing about resuming a queue (that is, turning the suspend setting off) is that all the jobs are eligible to process, and it just takes off in a hurry. It’s fun to watch. This assumes that everything else is ready to go; that is, the jobs are not also held (which we’ll talk about shortly), and the devices are available.
Here’s a scenario where you might want to suspend a queue. Let’s say you have a printer that is busy with other jobs, but at a specific time of day, it’s all yours. You could arrange to have all your print jobs held at the origin until your time slot. Or, you could send your print jobs to RPM whenever they are created, with the queue suspended. Then, resume the queue when everything is set up for you.
Let’s try suspending a queue. Go to the user interface, select the "archive2" queue, then check the Queue Status at the bottom left. It should be enabled, not suspended, not holding.
If you hover your mouse over the word "Suspended" you’ll see this tooltip:
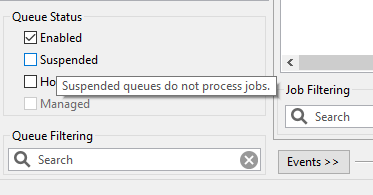
The tooltip serves as a reminder that "suspended queues do not process jobs". Since this is what we want, let’s select Suspended:
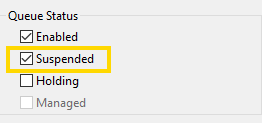
Once we do this, the queue list at the top shows a yellow printer icon for "archive2"
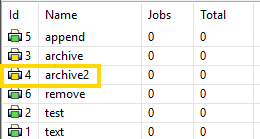
I’ll send some jobs to "archive2"
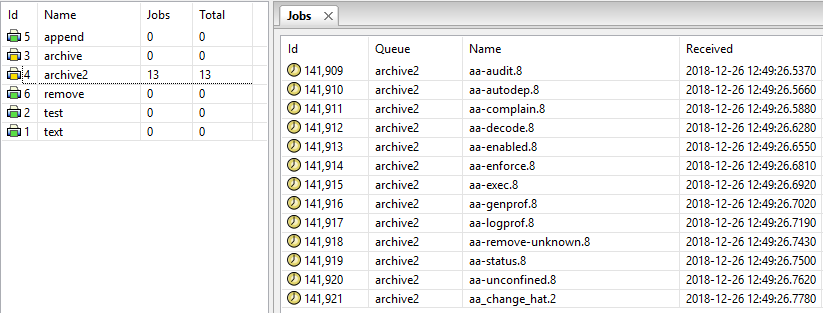
Note that these jobs are not processing; they have a "clock" icon of sorts, which shows they are waiting for something to happen.
While we’re here, let’s take a look at the job status. If you don’t know why a job isn’t printing, one good way to find out is to right-click on the job and choose View Status:
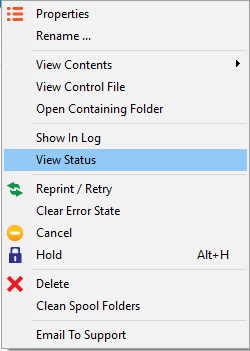
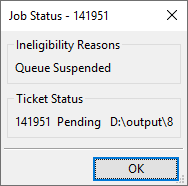
In this instance, the View Status shows us that the queue is suspended:
When I resume the queue by selecting the "Suspended" setting and turning that off, the jobs will start to process:

The reason the dates are different in this list from the list above is that the first time the jobs had already processed before I hit the screen capture button. I sent the jobs again and was quicker the second time.
Using queue hold and release
The queue hold setting works differently than the other settings. That difference is that jobs also have a hold setting which they inherit from the queue when the job is created. Jobs will not process when their hold setting is true.
One example application comes to mind. Some time ago, we worked with a customer who used RPM to drive a flatbed plotter. The workflow they wanted was to have anyone print their jobs to the plotter, although in fact, the jobs landed in RPM in a queue that was "held". Then, an operator selected one job at a time (in any order that suited them) and released the job to print.
For one thing, this kept RPM from retrying the printer frequently and ensured that the operator could remove the previous job entirely before the next started.
Another benefit to this approach is that the operator was entirely in control of the order in which jobs printed.
Let’s take a look at how to hold jobs, and how to release them when they are held. To hold a job, select a queue in the list at the top left of the user interface. Here I selected "Holding" and hovered over the word to display the tooltip:
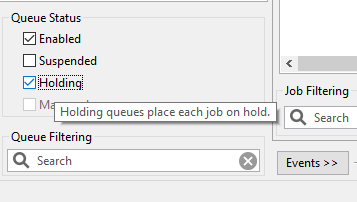
When we go back to the queue list in the top left corner, we see the queue "archive2" now has a lock icon:
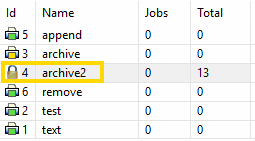
Now when we send jobs to this queue, the jobs also have a lock icon, indicating that they are locked.
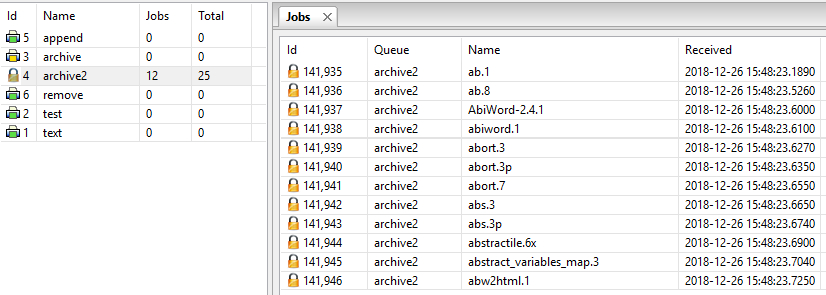
Earlier, we talked about right-clicking on a job and selecting View Status and saw the job was not printing because the queue was suspended. Looking at one of the held jobs, here are the results of View Status:
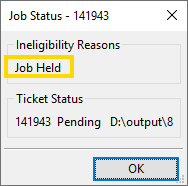
The job status form clearly shows that the job is not processing because it is held.
To release a job, select the job. You can release multiple jobs at once, and they don’t have to be next to each other:
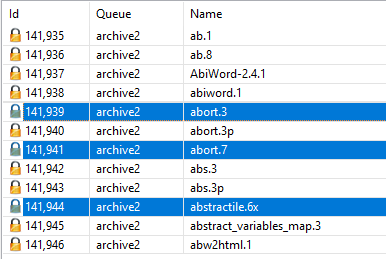
When you right-click on one of these jobs, you’ll see the context menu. Toggling the ‘Hold’ state is one of the options:
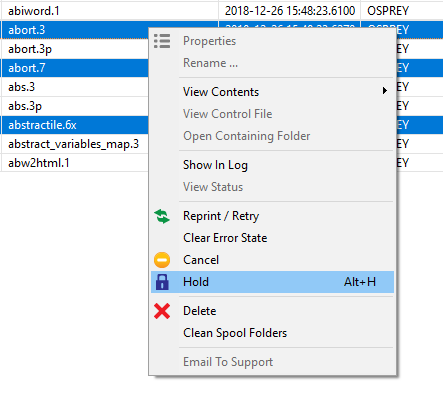
You can also use the keyboard shortcut, Alt+H, as the menu indicates, or the toolbar button with the lock symbol:

