Save a print job to PDF or any other format
The RPM Archive to Folder action makes saving a print job to disk easy. So naturally, we include several options.
Destinations you can use with the Archive action:
- a local folder, specifically local to this computer
- a shared folder
- a hidden folder
The archive action gives you a great deal of control over the filename. We’ll describe that in more detail below.
You can also:
- Create a new file; rather than overwrite an existing file, RPM will add -1, -2, etc., to the file path
- Append to an existing file, which will create the file if it doesn’t exist
- Overwrite an existing file, which will also create the file if it doesn’t already exist
Typical archive setup
I have a queue on my development computer called “archive,” which I use to test various job processing scenarios. But, of course, you’re not required to name the queue after the action.
Please note that I refer to the “archive to folder” action as “archive” for no particular reason.
Here is the queue setup dialog:
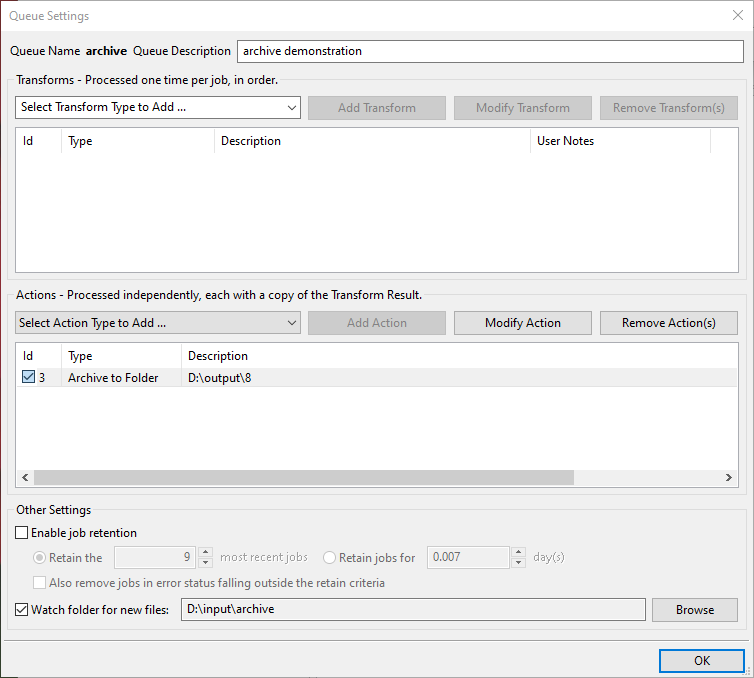
In this example, I have no transforms and only a single action, the archive action. I have job retention turned off, but this queue is connected to a watch folder. I have the Queue Folders module licensed on this computer, so any files sent to the “d:\input\archive” folder will be posted to the archive queue.
Here is the archive setup:
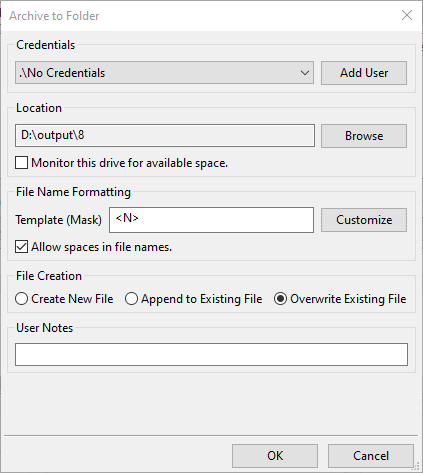
Let’s discuss the settings.
Credentials
If I planned to write this file to a shared folder or a hidden share, I would need to select credentials from the droplist. If I need new credentials, I'd use the button to add credentials to the list RPM has stored.
Location
The Browse button uses the standard Windows file browser. No mysteries here.
Note that I leave the “monitor drive space” unchecked. This is from an earlier era when disk drives didn’t typically have 143 GB or more of free disk space like mine do.
File name formatting basic example
RPM will use your job’s data to form a filename to your specifications. The contents of the Template or Mask field determine your filename.
Note that the default value is “
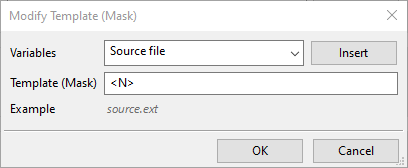
If you were to leave this unchanged, RPM would use the name portion of the job metadata to form the file name.
Please note that RPM will remove all illegal characters before creating the file: colon, brackets, and such.
If you wanted your files to have the same name as the sender chose, then you could leave this template alone and be perfectly content.
But, let’s say that I know I am archiving PDF files, so I want the filename to end with a “.PDF” extension because that makes sense in Windows. I can add a PDF extension to the filename by changing the template from “<N>
What happens if the user sends me a file with a PDF extension? If my file is called “lunar-ice.pdf” and I save it in this archive set up, then the file on disk will be “lunar-ice.pdf.pdf”.
If that’s not what I want, and I assure you I would not want that, it’s straightforward to work around. Let’s open the Variables droplist where we see “Source file”.
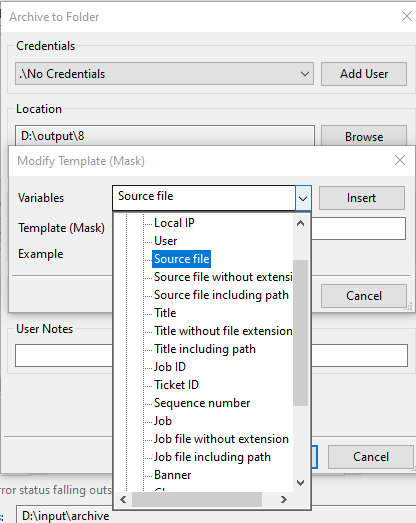
Note that immediately following “Source file” we find “Source file without extension”. If you scrolled to the right, that’s what you would see.
Let’s select “Source file without extension”. Now the Template form shows this:
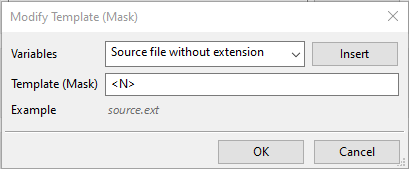
The template is a string you can build out of job data and your own text. That’s why the one control is called “Insert” and not “Replace”. We don’t assume we know what you want to do with the elements of job data. Instead, we make it easy to use the job information to build a filename string.
What I do is select “<N>
I like to use this when I send files that have no extension or have a “.txt” extension. Both produce a nice filename with a PDF extension only, no “txt” proceeding it. It’s a nice aesthetic.
More creative solution
This article shows how to use job data in a file name more creatively than what we’ve done here: