Our goal for this article is to produce one hard copy print out, and one archived file, from a single print job. RPM makes this particularly easy since you can configure multiple actions for any given print queue. People are often skeptical that this can be done and are impressed when we demonstrate.
The format makes a difference
It’s not difficult to describe this process but the specific answer depends in part on your print job’s format. Please see the article How to determine the format of your print job for more information.
We have observed 3 distinct nuances to this scenario of printing a copy and leaving a file on disk. The basic methodologies are similar and we’ll explain how the specifics depend on the file format. The 3 formats we work with here are:
- plain text
- PCL (for an HP printer)
- PostScript
The principles below can be applied to many similar situations. RPM is certainly not limited to these simple situations.
How to do a text print and leave a text file on disk
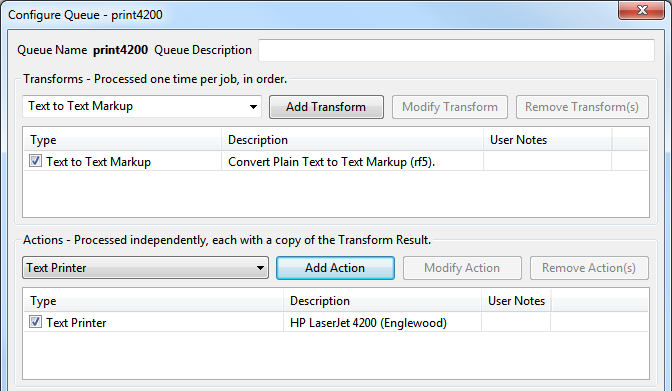
For this, let’s start with the simplest case, receiving a plain text file. First, add these two actions to your queue:

For the Text print action, select your printer, select the print properties, and press OK.

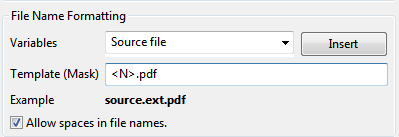
For the Archive to folder action, select the path you want to save the file in, select your naming convention, and if you are saving to a shared folder be sure to add credentials. We have an article on printing to a shared printer or archiving to a shared folder if you need to do that.
Now, when you send text files to this print queue, RPM will run the two actions. The Archive to folder action merely writes the file to disk, observing the setup you gave it.
The Text print action, on the other hand, does a bit more behind the scenes. If you submit plain text to the Text print action it will run the Text to Text Markup transform automatically with default settings that include:
- half-inch margins
- auto-calculate font size and page orientation
- Courier New font
- input code page ISO-8859-1 also called Latin1
- remove control characters and suppress blank pages
Most of the time, this will work fine for each print job. However, sometimes the format may not come out just right for you. In that case, please change our processing to this:
- set up two actions: Archive to folder action exactly as before, and Copy queue to send the job to a second queue
- in the second queue, add a Text to Text Markup transform and make the rows and columns what you want them to be
- add a Text print action as before
This time when you print to the first queue, the job will be archived and sent to the second queue. There the job will print exactly as you specified.

Archive and Copy queue example

Text to Text Markup, and Text print
How to convert an HP print job into a PDF on disk and a print job
This is the second common scenario. You have print jobs coming to your HP LaserJet (we have a number of these ourselves).
Let’s assume the print format is PCL. It probably is. First, add these two actions to your queue:
- a Raw print action, and select your printer in the printer list. If the printer is shared then add credentials as we described above for the shared text printer.
- a Copy queue action to send the job to another queue
When you send a job to this queue, it will go to your printer and will go to the second queue automatically.
In the second queue do this:
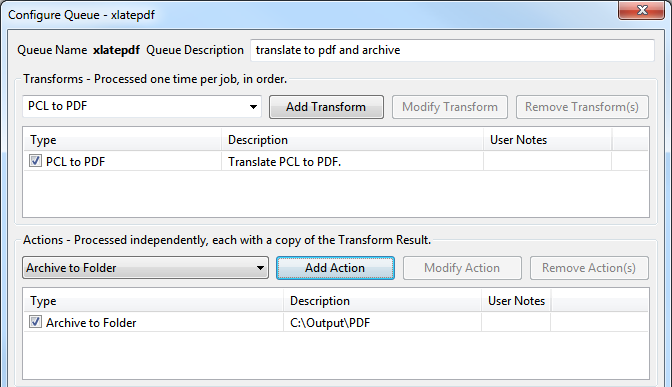
- add the transform PCL to PDF and select whichever options seem good. I usually leave them as a default unless there is an obvious need to do otherwise
- add an Archive to folder action. Usually, here I will change the filename template from <N> to <N>.pdf because the pdf extension will probably not come from your print source, and you want to know that these files are now PDF. Trust me, it’s better to do this now!

Our second queue is now basically a “translation queue”, translating HP print jobs in PCL format to PDF. It takes next to no time to copy a print job from one queue to another, and this still qualifies as a very simple job setup. Plus, nothing is stopping you from reusing this queue to translate other PCL files to PDF. Here is a sample configuration:

How to convert a PostScript print job to a PDF file on disk and a print job
The following setup assumes you know that the incoming file is PostScript. It’s best to know that with certainty or this setup will fail spectacularly. When in doubt, please review [How to tell what format your print job is].
For this setup, we are going to create 2 queues. For the print queue, we will do each of the following:
- a Raw print action if we’re fortunate enough to have a PostScript-ready printer
- otherwise, a Filter action assuming we have a printer with a Windows driver
We will also have a Filter action to translate the PostScript into PDF. First, we’re going to need to download GhostScript, so please review the article Using GhostScript with RPM if you need to know how to find this software. Please note at this point that you are responsible for observing the GhostScript license and determining what your responsibilities under that license might be. We’ll assume going forward that you are clear to use the software.
We have already documented how to print directly from GhostScript to a Windows printer in this article so please follow those instructions if your printer does not support PostScript natively.
This same article also describes how to use GhostScript to convert PostScript files to PDF. This comprises our second queue, the first being the ‘print’ queue.
How to do something slightly different, like text print and save to PDF
We hope you’ll accept that doing a text print plus saving a PDF is both a very typical application and very similar to what we have reviewed above.
- Set up a text print action as described in the first scenario
- The input for a text print action is text markup, so the second action is a Copy queue to a separate queue that includes
- Text Markup to PDF transform on this input
- Archive to Folder action to save that PDF somewhere
In conclusion
We hope that these 3 slightly different scenarios give you some insight into ways RPM can solve these problems. It’s a fairly simple workflow to print and archive. It’s not as simple as “click one button” but it’s certainly not complex. RPM was designed to solve these kinds of problems by making plenty of cooperative tools available and making sure the “job gets done” so to speak.